

Are you tired of struggling with intricate designs, wasting time on messy transfers, or simply feeling overwhelmed by the process of using heat transfer paper? If so, you're not alone. We have seen many beginners who are finding the process daunting and frustrating but fear not. Help is at hand. In this blog, we will discuss the 7 super easy steps to use heat transfer paper that will make you a hero from a zero. Whether you're looking to create custom T-shirts, personalized tote bags, or unique gifts, this guide will equip you with the knowledge and confidence to bring your creative visions to life.
As the renowned artist Pablo Picasso once said, "Learn the rules like a pro, so you can break them like an artist." In this modern age of heat transfers, it's time to go big. It’s time to get rid of old techniques and embrace the new technological approach. So, let's embark on this journey together and unlock the full potential of heat transfer paper. Let’s learn how to use heat transfer paper.
What Is Heat Transfer Paper?
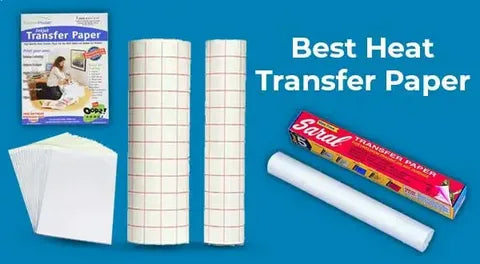
Before going into the complexities of how to use heat transfer paper, it is better to understand what heat transfer paper is. Heat transfer paper allows you to use heat to transfer designs, images, or text to various surfaces, typically made from a combination of paper and polymer coatings. This procedure usually entails printing your design onto transfer paper with an inkjet or laser printer and then applying heat and pressure to transfer the pattern to the appropriate surface.
Step 1: Choose The Right Paper
Let’s start our journey with “how to use heat transfer paper.”. First of all, if you want your results to be optimal, then you must be naive in selecting the right heat transfer paper. The selection of the paper is usually dependent upon the type of project you are working on. Inkjet and laser printers are commonly used for printing designs onto transfer paper, with each offering distinct advantages depending on the application. Additionally, factors such as paper type, colorfastness, and compatibility with different fabrics must be considered when choosing the right heat transfer paper for a particular project.
For example, if you are working on custom t-shirts, you can go for a high-quality inkjet printer paired with premium light-colored fabric transfer paper. This choice not only ensured vibrant and long-lasting prints but also allowed for easy application onto cotton and polyester blends.
Step 2: Prepare A Design
Before you print your design, think about the design layout, orientation, and size. Make sure heat transfer vinyl transfer paper fits well on the surface you're putting it on. If you want some space around the edges or for the design to go all the way to the edge, think about that too. Also, it's really important to mirror the design so that it's the right way around when you transfer it onto your surface, especially if it has words or detailed pictures. This makes sure everything looks just right when you put it on.
Step 3: Printing And Cutting
Using exceptional printing supplies and configurations is necessary to produce crisp and colorful designs on heat transfer paper. Also, if you are someone who is into graphics, then I suggest you adhere to the printer's manufacturer's recommendations for paper type and resolution. It can have a big impact on how durable and clear the transferred image is. Additionally, to obtain clean edges and remove the extra paper for a seamless transfer, you must carefully cut the printable heat transfer paper.
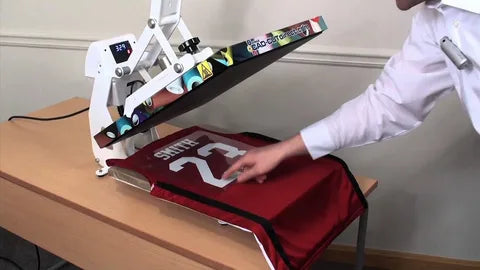
Step 4: Using Pressure and Heat
Heat and pressure must be applied during the transfer process to activate the transfer paper's adhesive capabilities and fuse the design to the surface. Transfers produced by heat press machines are safe and reliable because they provide accurate temperature control and consistent pressure distribution. However, if you are just a DIY enthusiast, then you can use a household iron to transfer paper heat. For that procedure is pretty simple, as long as it can reach the required temperature and apply enough pressure to guarantee perfect adherence.
Step 5: Peeling and Finishing
It's important to give the transferred design enough time to cool down after the heat transfer procedure is finished to avoid smearing or distortion. Careful peeling of the dark heat transfer paper, preferably in a smooth and continuous motion, minimizes the risk of tearing or wrinkling. Once the transfer paper has been removed, inspect the finished product for any imperfections and make any necessary adjustments.
Step 6: Caring for Your Finished Product
Heat-transferred designs require proper care and preservation to extend their longevity and maintain their pleasing appearance over time. It can be done by adhering to the manufacturer's washing and care instructions. It includes washing the shirt inside out in cold water and avoiding the use of bleach or harsh detergents. It's also advised to air dry or tumble dry on low heat to avoid premature fading or cracking of the artwork. We hope that we have answered questions like “How to print on heat transfer paper, what is heat transfer paper”, etc.
Lucky Wholesale: Perfect for Heat Transfer Paper
In the HTV wholesale business, the three most important elements are functionality, cost, and quality. Lucky Wholesale offers all three. At Lucky Wholesale, quality is guaranteed rather than promised. Their heat transfer paper is expertly and accurately made. With their paper, you can transform your simple concepts into artistic creations. In retail, pricing is crucial. We are aware of how important it is to balance quality and pricing. Prepare to boost sales income with their reasonably priced HTV vinyl wholesale. So, what are you waiting for? Shop now!